4.2 Disposables and consumables
As you learned earlier, where possible, we should always try and minimise waste and where there is an alternative to disposables, you should opt for that. However, in the interest of hygiene, there are certain products that will have to be single-use. In this lesson, we will look at the full range of disposables and consumables that you will use on a daily basis as a lash technician.
Training lashes
Training lashes, or practice lashes, are used for exactly what their name suggests – training! When you purchase your mannequins, suppliers will usually throw in some training lashes, and you can also purchase them separately. Practice lashes come in strip form, and they are designed to mimic a client’s natural lash. They come in all shapes and sizes and are made of various fibres, and they will be your best friend when you are starting out. Self-adhesive training lashes are the best type to get, so you can quickly pop them on your mannequin.
Lashes
As we have covered in great detail in the previous module, lash extensions come in a wide range of materials, curl shapes, lengths and diameters. Of course, it would be impractical for you to have every single style available in your kit when you are starting out, so we would recommend having mixed tray lashes (varying lengths) in the following diameters:
- 0.03mm
- 0.05mm
- 0.07mm
- 0.15mm
In terms of the material, you should definitely have synthetic in your kit, and depending on your preference and the preferences of your clients, it is good to have some flat lashes on hand for those clients who cannot tolerate much weight. In terms of curl, we would recommend always having B, C and D curls as these will be suitable for most clients for a range of styles. It is always good to have some L curls with you for those clients with super straight lashes! As you start to build your client base, you will quickly learn which curls you are using the most of and which you are using least, which will help you to fine-tune your lash quantities.
Adhesives
The type of glue you use is just as important as your lash selection! Poor quality glue or the wrong sort of glue will impact lash retention and may even cause contra-actions. As you learned earlier in the course, when we looked at contraindications, the main ingredient in lash glue (80%) is cyanoacrylate.
Key phrase | Cyanoacrylate: a type of glue that is composed of an acrylic resin. Much like traditional resins, when cyanoacrylate glues cure, they transfer into a plastic state.
Of all the scientific words to learn how to pronounce, cyanoacrylate (sahy-uh-noh-ak-ruh-leyt) is the one to learn! All lash extension glues are all cyanoacrylate based, and it is the “magic ingredient” that makes the glue sticky! Without this ingredient, the adhesive will not work. Cyanoacrylate is very sensitive to both humidity and moisture levels as well as temperature; the slightest amount of moisture starts the curing process. If you do not control your environment, your glue can either over cure or under cure:
- Under curing – adhesive remains wet and sticky
- Over curing – adhesive shock cures, resulting in fracturing and brittle bonds and can turn white (also referred to as blooming)
Under curing and over curing will result in poor retention, so it is important that you work in an optimised environment. High humidity will result in your glue drops curing too quickly, and in a hot country like Australia, this can be a bit of a challenge. Depending on where you live, and the time of the year, the humidity may also be too low. The consequence of low humidity is that your glue will not have enough moisture to be able to cure, and your adhesive will just remain wet. You want to aim for a humidity level between 45% – 60% for your curing to not be impacted. The table below provides some tips for combating high and low humidity:
| To combat high humidity… | To combat low humidity… |
|---|---|
| Use a dehumidifier Use an extraction fan Use moist absorbers Ventilate your workspace | Use a dehumidifier Use a nano mist spray Use an extension base product to accelerate the drying time |
Alternatively, if you work in a really humid climate, you will need to buy special glues that are suitable for humid climates. These adhesives will have a slower drying speed, meaning you have more time to work before it cures. Likewise, if you are working in a low humidity environment, you will want to select lash glues with a faster drying speed. In turn, there are three main types of cyanoacrylate to cater for the different environments:
- Ethyl cyanoacrylate has a fast curing time and tends to have strong fumes; it is the most popular in the market
- Ethoaxyethyl cyanoacrylate is slow curing (you may need to use a primer or extension base to speed up curing), has no fumes and is ideal for sensitive clients.
- Butyl cyanoacrylate has weak fumes and a slower curing rate
In addition to humidity, the temperature will also have an impact. If you think about water, for example, in colder temperatures, water will freeze, and in really hot conditions, it will boil – think of lash adhesive in the same way. If the temperature is too cold, the lash glue will take longer to dry, and if it is too high, it will dry too quickly. The ideal temperature to aim for is 22-26°C / 71-79° F.
So, without being a meteorologist, how can you determine humidity and temperature levels? A hygrometer is an excellent investment, and it is a little machine that measures the humidity and temperature of a room. You can pick one up for under $20, and it will save you so much time in the long run. It is better to adjust your environment before you begin your treatments rather than trying to fix poor retention or other issues reactively. All hygrometers are different, but most will have a visual display that will show you the humidity percentage and the temperature.

Preparing adhesives
Preparing your adhesives isn’t just simply plopping a blob onto your glue palette! There are important steps to follow to ensure that you get the most out of your adhesive and to help facilitate good retention of lashes. There are lots of adhesives on the market with different fixing times, curing times, colours and ingredients. When you first start out, you should use a slower (intermediate strength) adhesive due to the dry time. This will give you extra working time, especially when you are practising your tweezer grips and lash placement!
When working with adhesives, consider the following tips:
- Always make sure your adhesive is standing upright.
- At the start of your working day, you will need to give your adhesive a really good shake (at least one minute) as the particles will separate overnight.
- Make sure you always keep the lid on your adhesive when you’re not dispensing the glue, as the moisture in the air will ruin your adhesive.
- When dispensing your adhesive, turn the container with the nozzle facing downwards and let the adhesive slowly move down; when you see the adhesive get to the nozzle of your container, give it a little squeeze, and let a small blob come out onto your jade stone or glue palette.
- Keeping the nozzle of your adhesive clean is very important, so your glue doesn’t bubble out and get stuck on the lid.
To learn more about preparing your adhesive, watch the following AED video:
Dipping adhesive
Correct adhesive preparation is only one part of the process; you also need to master correct ‘dipping’ into the adhesive. Incorrect dipping will result in either too much glue or not enough glue, which will result in poor retention. Too much glue will also damage the clients natural lash due to the extra weight. To learn more about how you can dip adhesive like a pro, watch the following AED video:
Once you start practising and using adhesive, you will no doubt run into a few challenges. This is completely normal, and you will learn from your mistakes – you will only leave the cap off your glue a couple of times before you never do it again. Mistakes can be costly, so consider the following additional glue tips when working with your lash adhesives:
- “Burp” your bottle by squeezing the sides and reapply your lid tightly
- Store adhesives away from direct sunlight
- Adhesives can be stored in the fridge prior to opening
- Always write the date of opening on your bottle
- Adhesives have a short shelf life of 5 –7 weeks only
- Never allow cotton to come into contact with your adhesive – cyanoacrylate and cotton create an exothermic reaction; use an adhesive wipe instead (supplied in your kit).
If you would like to learn more about adhesives, access the resources linked:
Glue remover
Glue remover is a staple for your kit for removing glue from your pallets and for removing glue from clients lashes. Glue removers come in gel form and cream form. There are ‘at home’ glue removers on the market, but you should strongly advise your clients that glue removal should only be used by a professional and not at home.
Glue remover does what it says, it removes glue, but there are, of course, differences. Cream removers are the traditional form of adhesive remover and are excellent for removing entire sets. Gel removers can be useful for removing isolated lashes and an entire set. See a comparison of each below:
| Cream glue remover | Gel glue remover |
|---|---|
| Thick consistency Easy to use Great for full set removal Safe and simple way to remove lashes | Thin consistency Best to use on small areas Can be fiddly to work with |
There are hundreds of glue remover products on the market with different smells, colours and consistency. Just like lash adhesive, be sure to place the cap straight back on the bottle of your glue remover to ensure it does not deteriorate.
If you would like to learn more about glue remover and tips for applying it, access the resources linked:
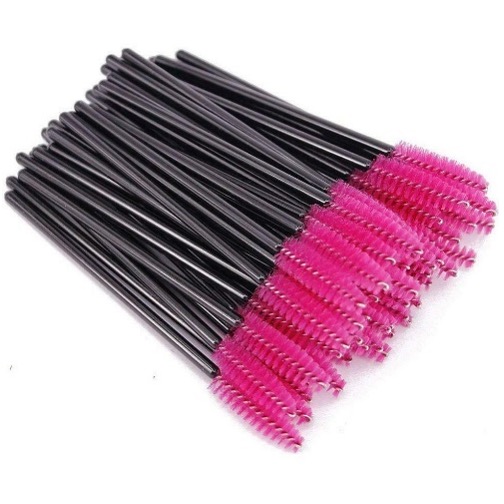
Mascara wands
Disposable mascara wands are excellent to include in your aftercare kits for clients and can also be used in your treatments for brushing out clients lashes. Even though there are reusable mascara wands available for purchase from any makeup brush supplier, for hygiene reasons, it is best practice to use single-use wands on your clients.
Because eye infections can be highly contagious, using reusable mascara wands (even if sanitised correctly) increases the chances of spreading infections between clients. Mascara wands are inexpensive, and you will usually purchase them in bulk packs.
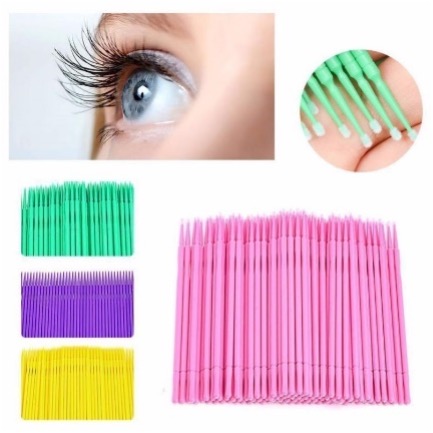
Micro brushes and sticks
Micro brushes and sticks are used at the start of each set to clean your clients lash extensions and/or natural lashes. Makeup artists tend to use Q-tips to clean lashes, but as lash technicians, we need the bristles in the micro brushes and sticks to deeply clean each lash. The cleaner the natural lashes are at the beginning of each set or infill, the better the retention will be of the extensions. Micro brushes are also great for applying primer, glue remover and other lash treatments.
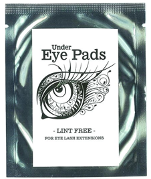
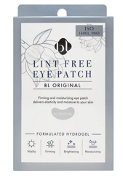
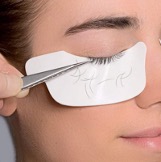
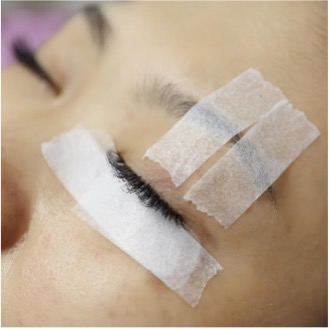
Lint-free eye pads
Eye pads are essential for ensuring your client is comfortable throughout the service, and they will help to ensure those bottom lashes are safely tucked away! Because the skin under the eye is so delicate, you need to make sure that the eye pads you use are sticky enough to attach but not so sticky they will pull on the client’s skin.
As you learned earlier, you may use some micropore tape over an eye pad to help with keeping it in place. Any eye pads and patches you use should have a lint-fee coating to prevent any fibres from transferring onto the lashes. If you have a bit more to spend, you can get gel eye pads which also provide a hydrating treatment for the client. Here are some examples of eye pads currently available:
Under eye lint-free eye pads
BL lint-free collagen eye patch
Silicone
Micropore tape
Micropore tape is a type of surgical tape that you will use to cover the lower lashes, tape the eyelids, secure an eye pad or protect your jade/quartz stone when using adhesive. Micropore tape should not be super sticky; it needs to be easily removed without damaging your client’s skin or lashes. If you have tape that is very sticky, try to find a tape that is suitable for sensitive skin types.
Sponges
Sponges can be used for various tasks, including wiping off the adhesive from the bottle, cleansing, and when you are starting out, they are the best tool to practice lash placement! Using a makeup round (round sponge), you can begin to practice applying lashes along the outer line of the sponge as it simulates a lash line. The curve of a makeup round will also give you practice placing lashes in the correct direction. You will learn more about practising on makeup rounds in the skills hub.
Lash primer
The jury is still out as to whether or not face primers actually help your foundation to stay put for longer, and many makeup artists disagree. Lash primer, on the other hand, there is no question that it is an important part of every kit. The main function of the lash primer is to dissolve natural oils and any residue. If you have clients with naturally oily skin, then lash primer is a must! That said, using too much primer can dry out the lashes, which will make it difficult for the extension to bond to the natural lash. Similarly, if your client has naturally dry skin or dry lashes, the primer will just dry them out further, so give it a miss for these clients.
If you would like to learn more about lash primer, access the resources linked:
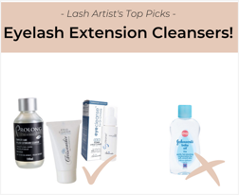
Oil-free cleanser
Naturally, our bodies create oil, which breaks down the adhesive bond faster and can cause poor retention of the lash extensions. As such, when you are purchasing cleansers to use in your lash services, you must ensure that they are oil-free. There are lots of cleansers on the market, including foam, cream and gel.
It is important when you are giving your aftercare advice that you also explain the impact of oils on the lashes and why oil-free cleansers are a must! To prevent the build-up of oil between lash sets, your clients should cleanse their lashes daily. As you learned earlier in this course, it is always best for you to stock cleansers that your clients can purchase so that you know they are using a reputable cleanser.
To apply cleanser, it is a good idea to get yourself brushes that are made for cleansing/shampooing. When using brushes of any kind, always check the bristles regularly to ensure that none of them have become scratchy over time.
A common misconception when it comes to cleansers is micellar water. Many lash technicians recommend micellar water to their clients, but we suggest that you steer clear. Some micellar water formulations actually contain oil, and if your client uses such products, it will compromise their lash extensions.