7.4 Editorial makeup
Editorial makeup is makeup that is not worn on a daily basis. It is makeup specifically intended for the runway or used with photography (i.e. fashion photoshoots). This type of makeup has to convey a story or theme that has been briefed by the client, brand, or shoot director.
Below are some examples of a few editorial looks:
Editorial look no. 1
This high-end fashion/beauty look is actually surprisingly simple to create utilising a few of the skills and techniques you’ve learnt so far:
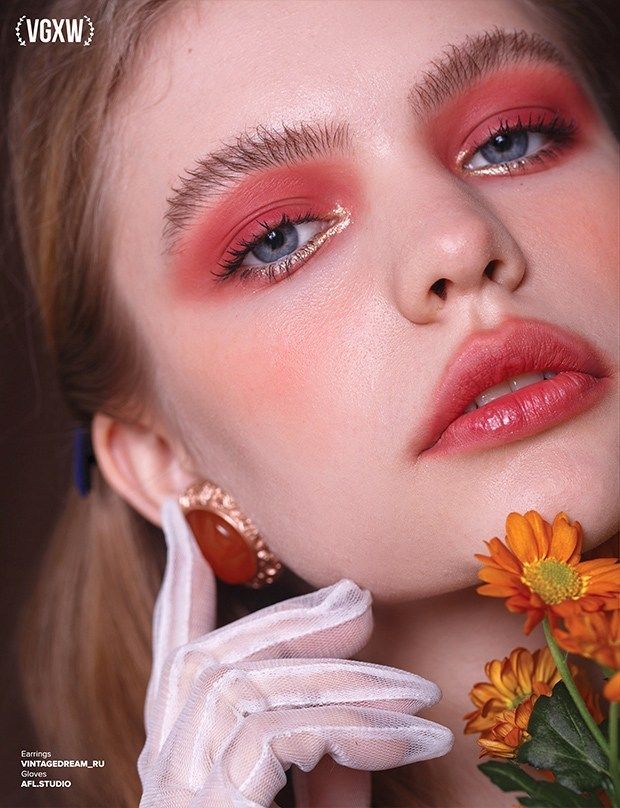
Tips to creating this look:
- Flawless, matte coverage
- A pink monochrome colour used on the eyes, cheeks and lips is a simple way of creating a creative, colourful editorial look
- Feathered, brushed-up soap brows
- The smudged lip creates a lip stain effect, as opposed to a crisp, defined line
- The pop of gold draws attention to the model’s eyes.
Expert tip: a pop of shimmer liner can be created by dipping an eyeliner brush in a small amount of water before using your chosen eyeshadow .
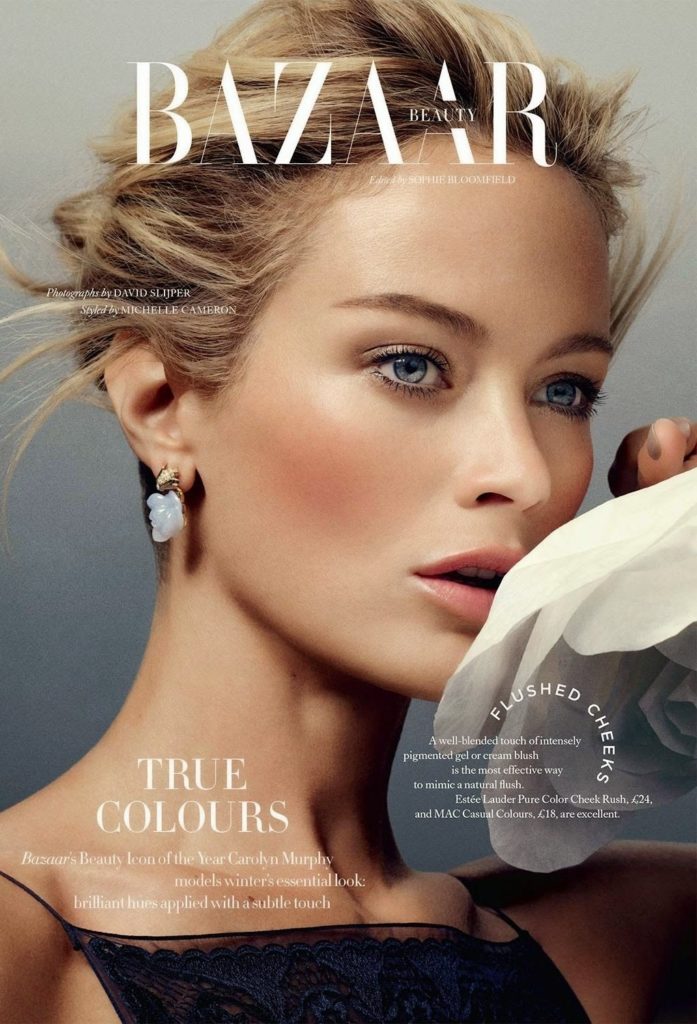
Editorial look no. 2
A go-to for many beauty campaigns, this look incorporates no trends or fads, but is simply timeless, elegant makeup.
Tips to creating this look:
- Beautifully prepped and hydrated skin, light flawless foundation
- Avoid heavy contouring
- Natural lashes coated in mascara
- Tidy natural brows
- Use a complimentary colour on the cheeks and lips
Expert tip: if no false lashes are used, be sure to curl the natural lashes to create a lift
Editorial look no. 3
Sometime the brief will allow you to really get creative! This editorial look uses bold colours and prominent fake lashes to create a striking look on music superstar, Rihanna.
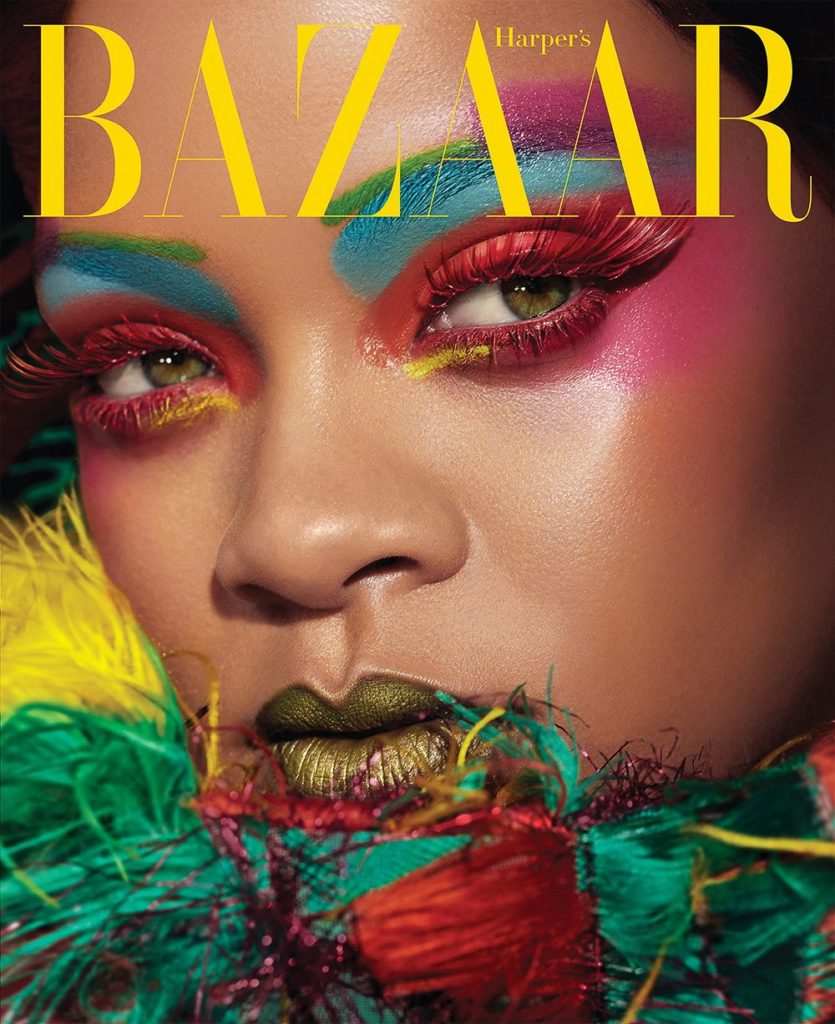
Tips to creating this look:
- Full coverage, dewy, flawless base
- Use contrasting colours to create angles and highlights
- Aside from that, there are no rules… get creative!
Expert tip: actually, there’s one rule. Unless intentionally aiming for an asymmetric finish, be sure to keep perfect symmetry from one side to the other.
Before we progress, let’s talk photography and makeup
Let’s face it, with everyone having camera phones, most makeup looks will be photographed! When makeup is photographed, it can look different to what it does in person due to a range of factors, including lighting, studio conditions, the photographer and camera flashes. If we use Instagram influencers as an example, their makeup in real life will look really cakey and packed on, but when photographed, it can look seamless and on point. The use of filters on Instagram also has an impact on the overall look, so you need to bear this in mind as well. As an example, look at the difference in the comparisons below:
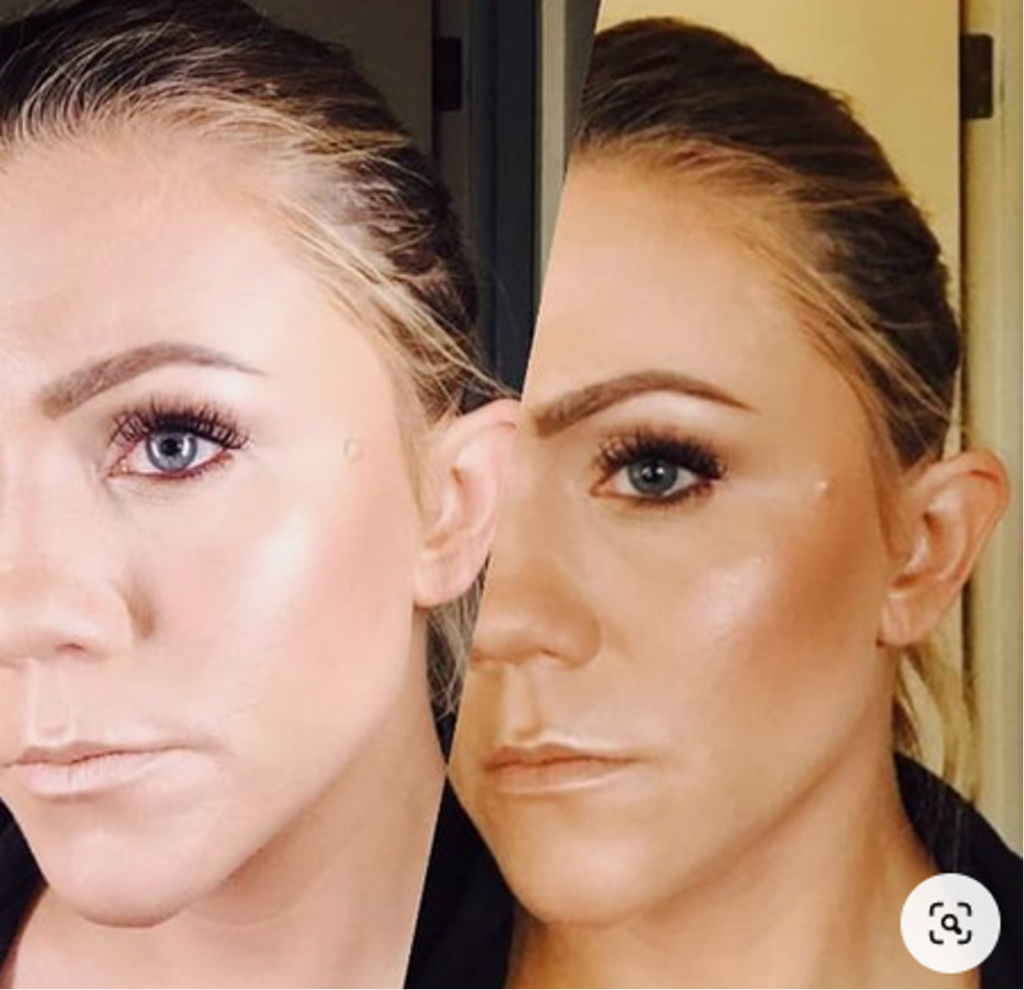

As you can see in the above examples, the same makeup can look completely different depending on the lighting. Now, makeup photography is a completely separate area of expertise, but at a basic level, you need to understand that lighting will impact how your looks will look. Examples of when you will need to do makeup looks specifically for photography include, but are not limited to:
- Business headshots and website images
- Wedding
- Fashion
- Commercial shoots
- Catwalk
- Social media
The best way to learn about lighting and the impacts is to take photos of yourself and clients in varying lights. When you begin taking photos of your work, you will soon see that colours may appear different in certain lights, and specific angles will make the makeup appear better or worse. Earlier in this module, you learned about colour theory and the hues of colour. This is relevant photography makeup. If the hue of lighting is too warm or cool, colours will appear as different shades. The image below provides a basic guide for lighting to choose depending on the makeup look:
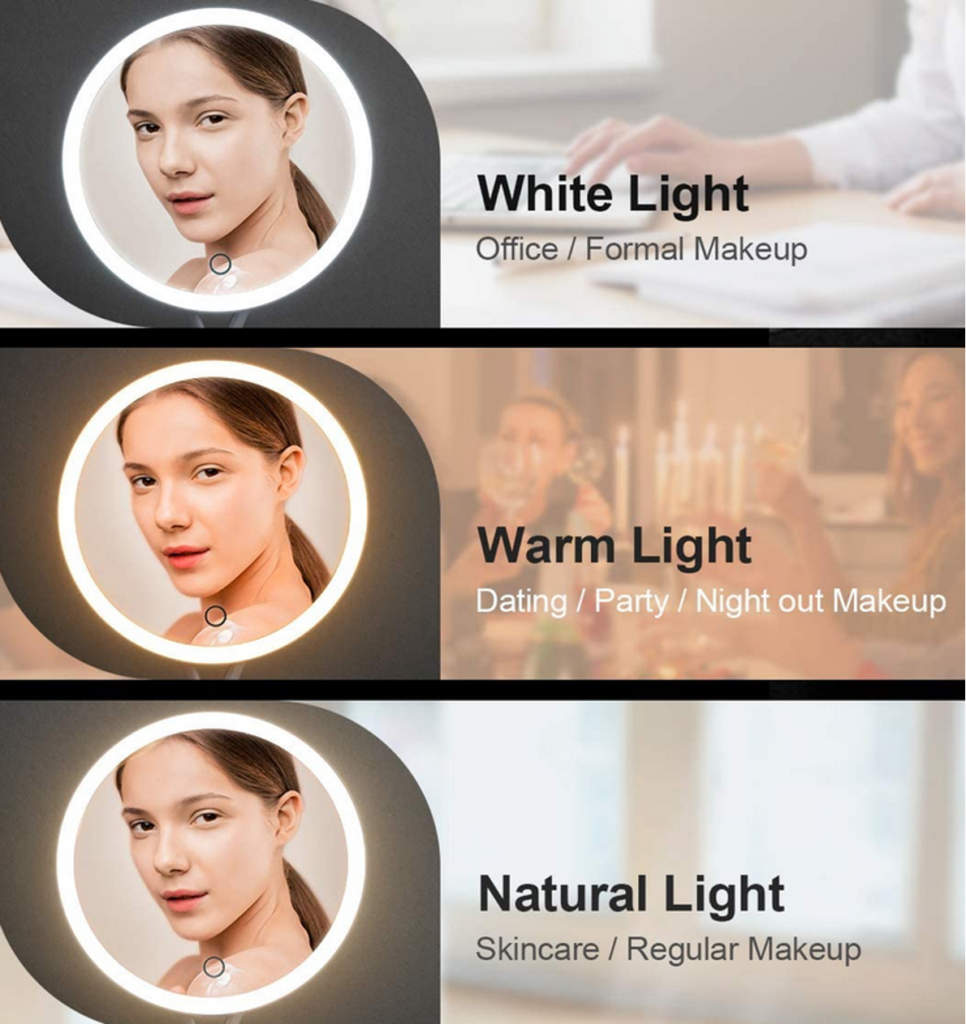
Of course, lighting in your work area will also impact how colours look when you are applying makeup. Where possible, applying makeup in natural lighting is always preferred, but if you work in a salon or you are working in the evening, this is not always possible. When selecting lighting for applying makeup, as a general rule, remember the following:
- Yellow lighting may make your client look tired, causing you to over-apply concealer
- Red lighting may cause a fake healthy glow, and therefore you could be under applying concealer on your client
- Fluorescent lighting may cause your client’s skin tone to look washed out, and as a result, you may over-apply bronzers or blush
As you refine your skills, you will learn what works for each situation. For black and white photos, you will really need to consider shadows and contouring. If you do not apply enough contour, then the makeup will simply not show up. Another important factor to consider is something in the industry which is known as ‘flashback’.
Key phrase | Flashback: Makeup flashback refers to the white cast that can appear on your skin in photos due to the use of certain products.
As the definition suggests, a makeup flashback is a white cast that looks like white splotches when a photograph is taken. In real life, the makeup can look perfect, but under flash photography, it can look awful. To give you perspective, check out these examples:

The biggest culprit for flashback is the use of sunscreen or moisturisers, which contain Sun Protection Factor (SPF). If you think about it, SPF is designed to reflect light (the sun), so it does the exact same thing with flash photography. In addition to SPF, you also want to avoid any products that will reflect light, such as setting powders, sprays and anything that contains light-reflecting ingredients such as titanium dioxide or zinc oxide. If you are ever worried about potential flashback, use the flash on your own camera to test out a look and see if it shows. The last thing you want is for a bride to have white splotches throughout her wedding photos! Should any flashback occur, it isn’t the end of the world because photos can be edited; it just makes the photographers job a lot more complex.
Practical Activity
Over the course of the next week, find three editorial makeup looks online or in fashion magazines and have a go at replicating them either on a friend or family member, or a face chart. Try to select a range of different editorial looks and not three that are too similar.